How to set up BigQuery linking in your Google Analytics 4 property
There is no backfill, so start collecting data now. This is how you set up the BigQuery export from Google Analytics 4 (GA4).
One of the most promising features in the new version of Google Analytics (GA4) is definitely BigQuery linking. All GA4 property owners can now enable the data export to BigQuery and start to utilise the raw event data collected on their website(s) and app(s).
Free at last!
In the previous version of Google Analytics (Universal Analytics) this integration was only in scope for GA360 enterprise properties. In GA4 the data export is free for everyone to use, you only pay for the actual data storage and data querying when you exceed the limits of the Google Cloud free tier. Your credit card will only be charged after 1 TB of querying per month and 10 GB of storage).
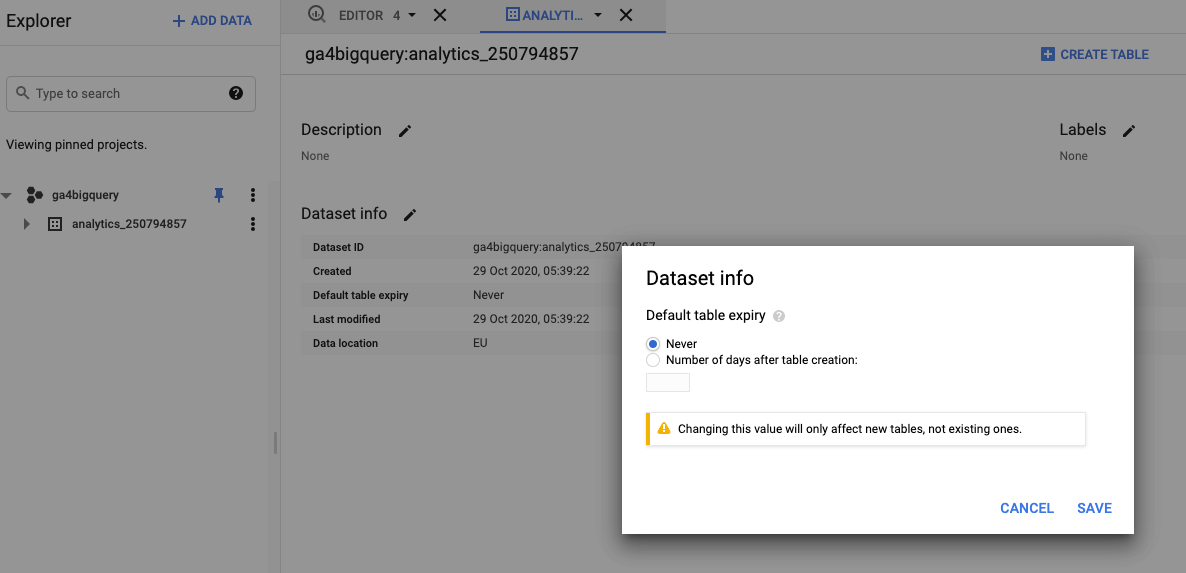
You can also use the BigQuery sandbox environment without a credit card, but then you'll risk your data tables to expire after 60 days. If you upgrade to a billed account before this 'deadline', make sure you update the table expiration settings so you don't lose your data.
Why should you enable the BigQuery linking for GA4?
I can think of a couple of reasons:
- store your data in BigQuery (Google Cloud) and/or send it to your data warehouse in other clouds like AWS, Azure or Snowflake
- join and enrich your data with other marketing/crm/contextual data
- visualise your data in tools like Data Studio, Tableau, Looker or PowerBI
- perform advanced analysis on your data
- leverage your data as input for (machine learning) models
So let's make sure we start sending data right away, as there is no backfill for historical data we already collected in GA4.
To proceed with the BigQuery linking you need:
- a GA4 property
- a Google Cloud account (see check list)
- to have BigQuery
Ownerand at least GAEditorpermissions
Check, check, double check? Let's go!
Step by step instruction
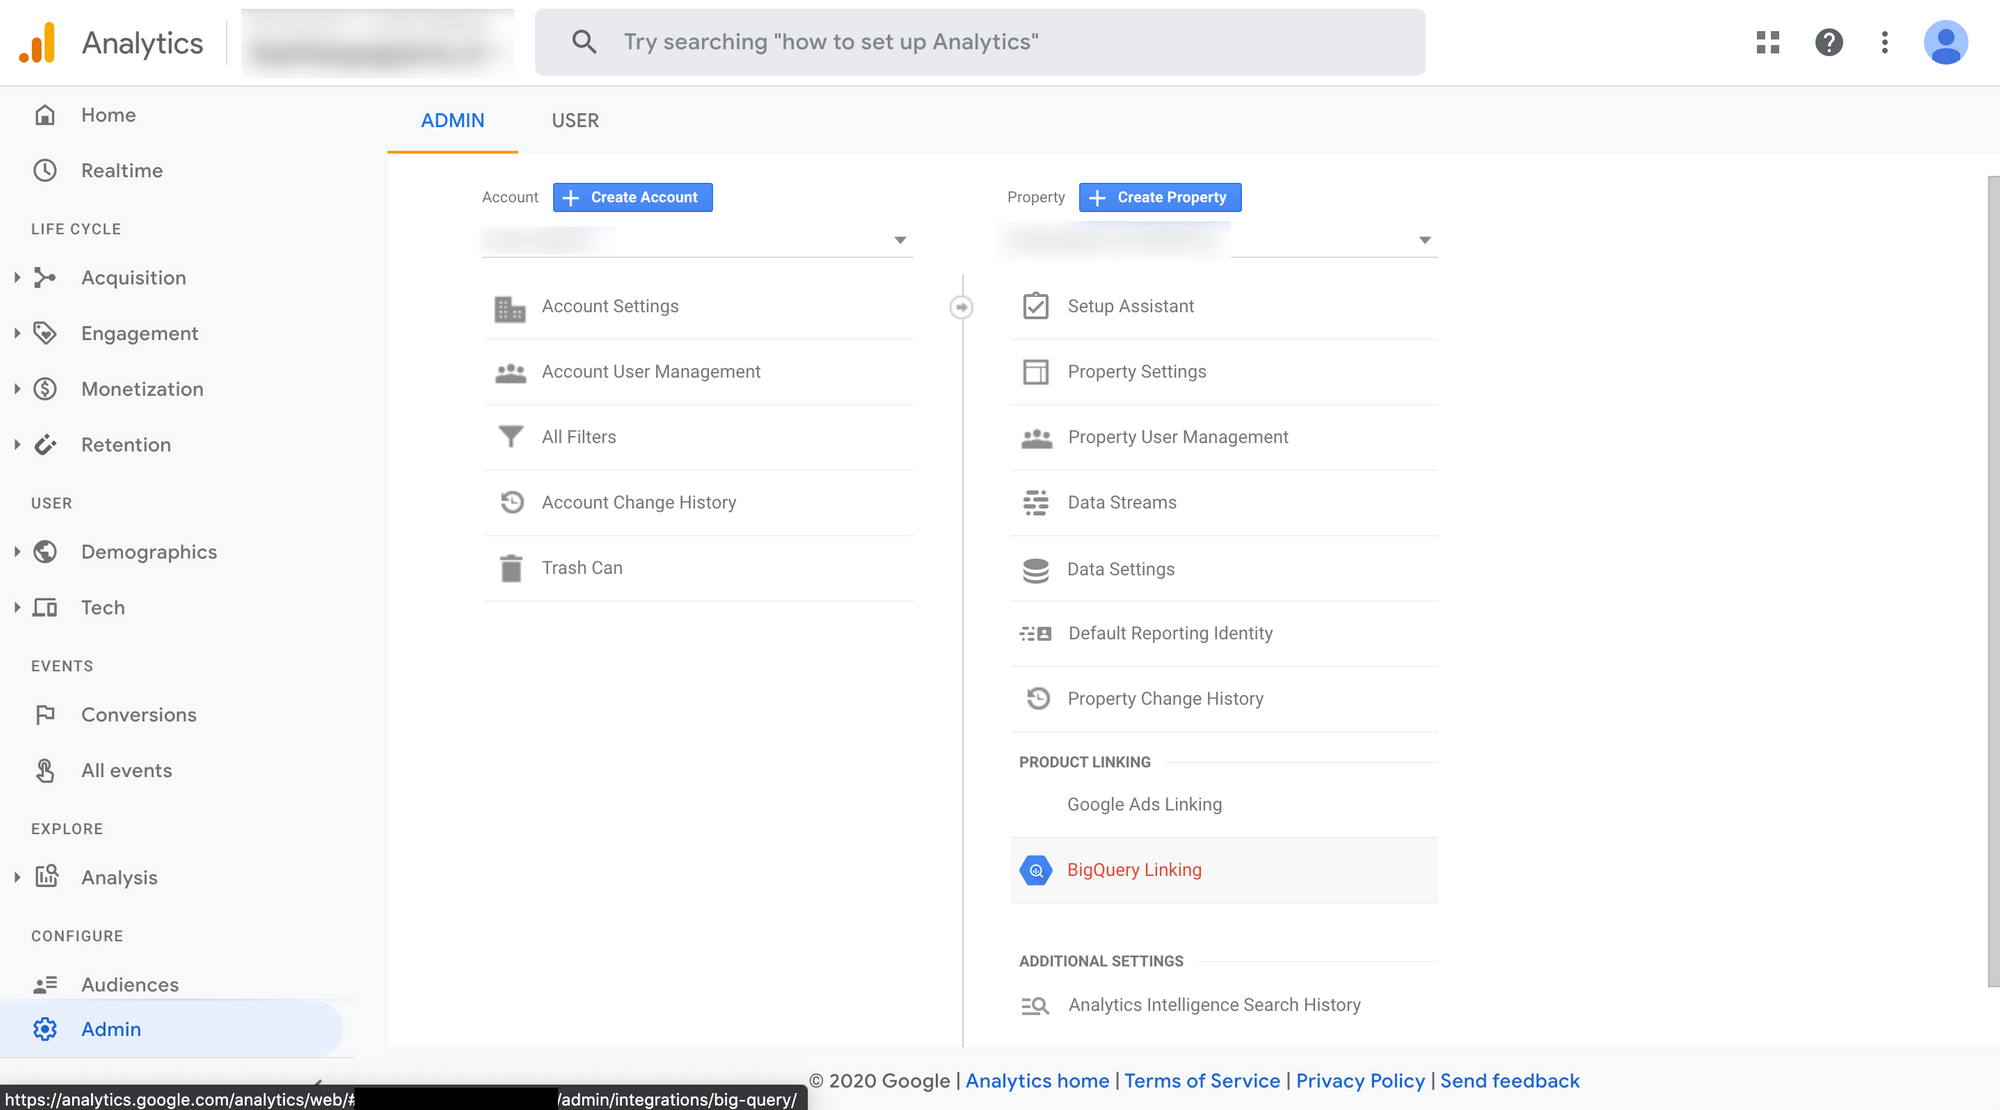
1. In your GA4 property, click Admin and then BigQuery Linking.
2. Click Link to create a new connection.
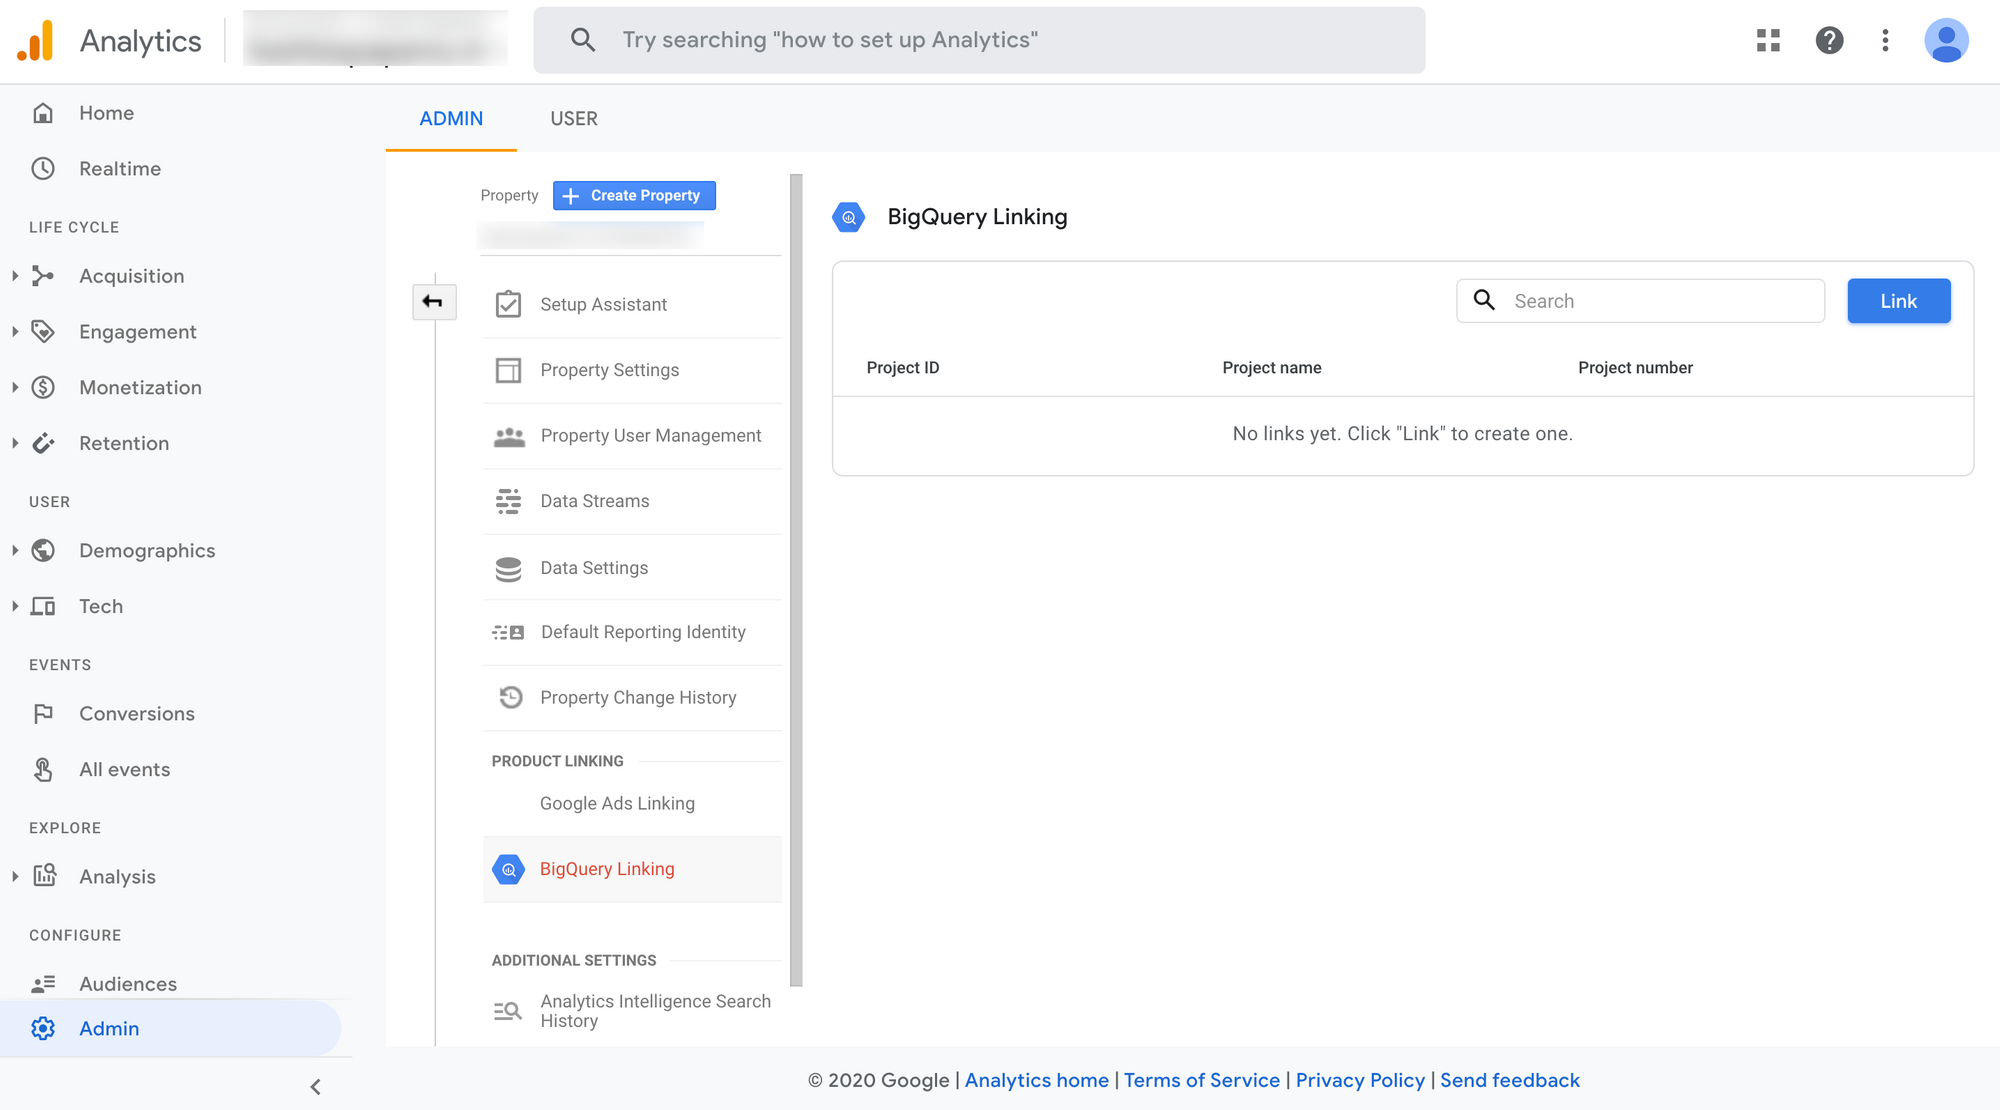
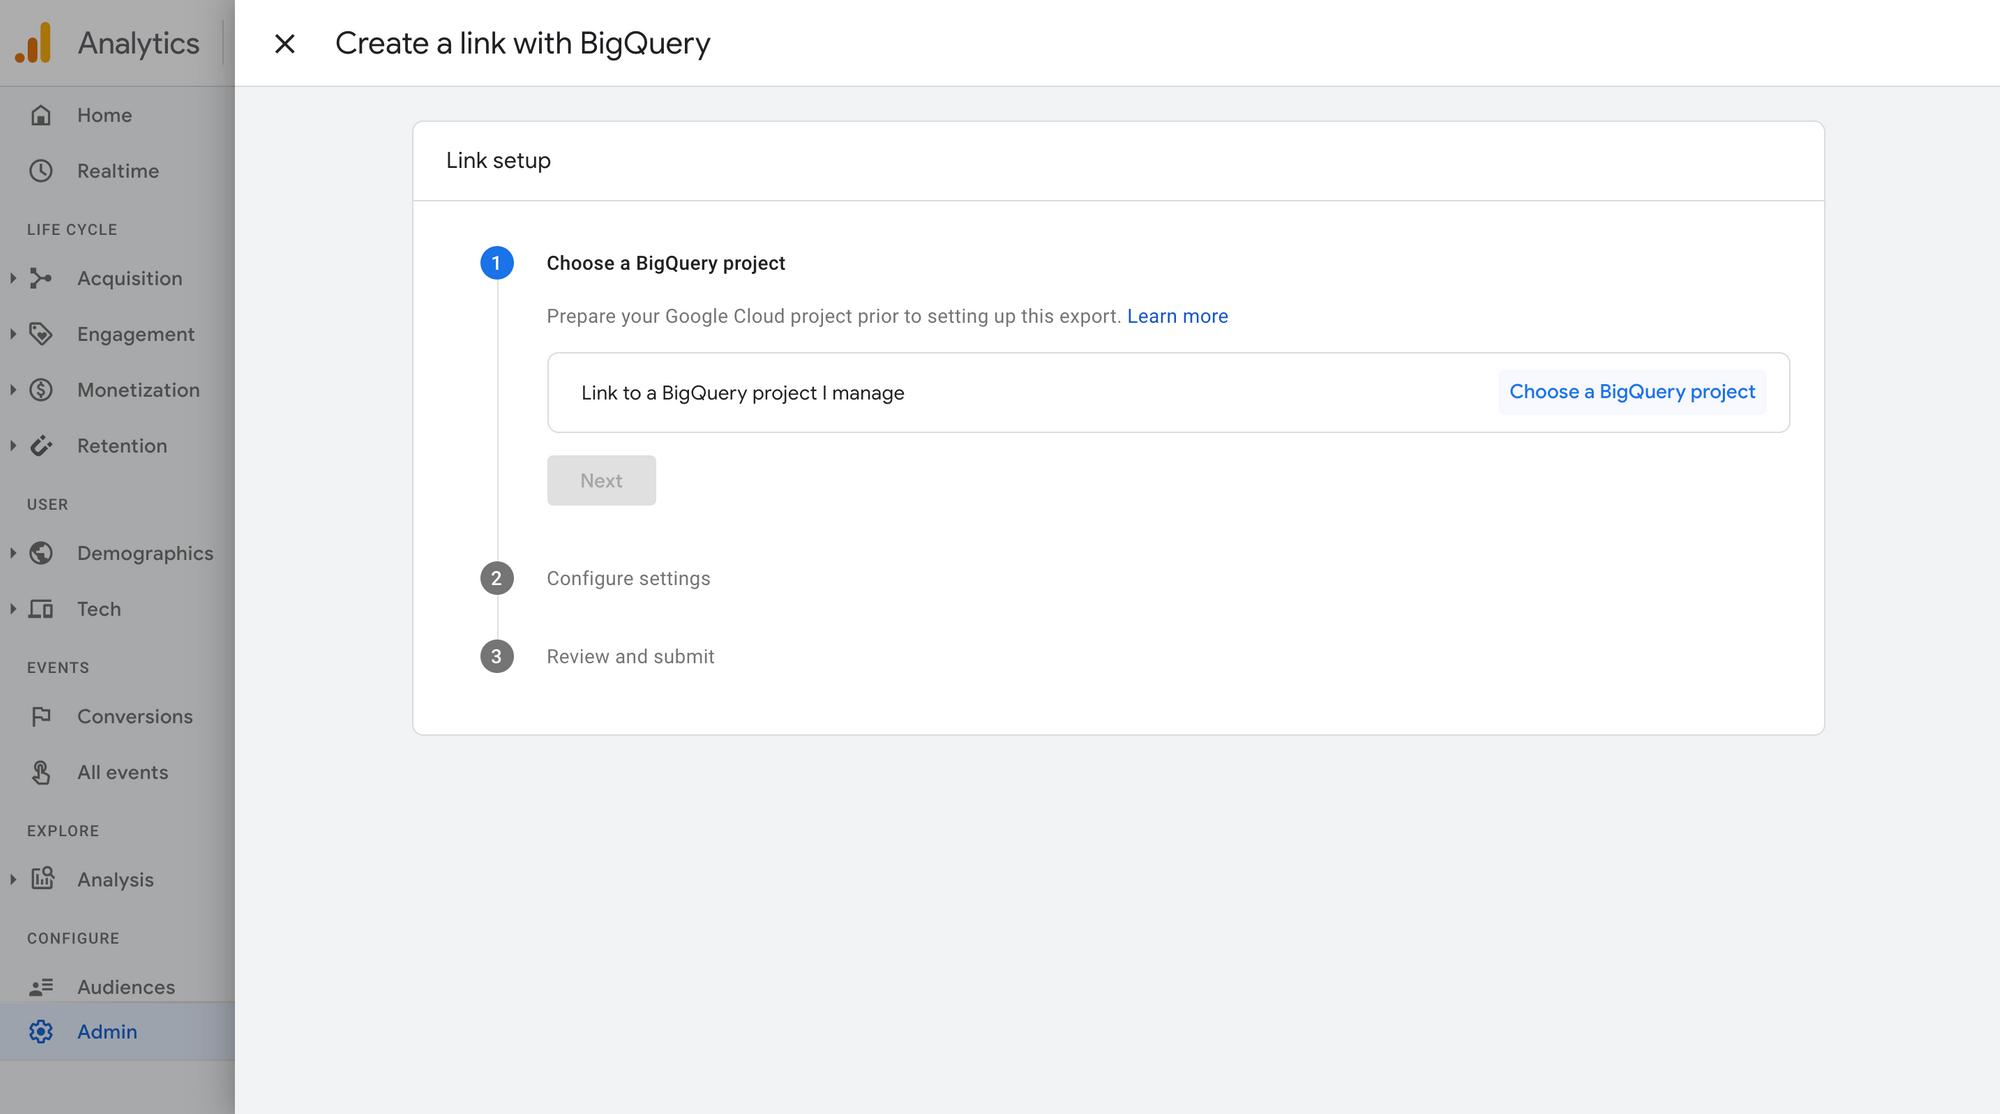
3. Click Choose a BigQuery project.
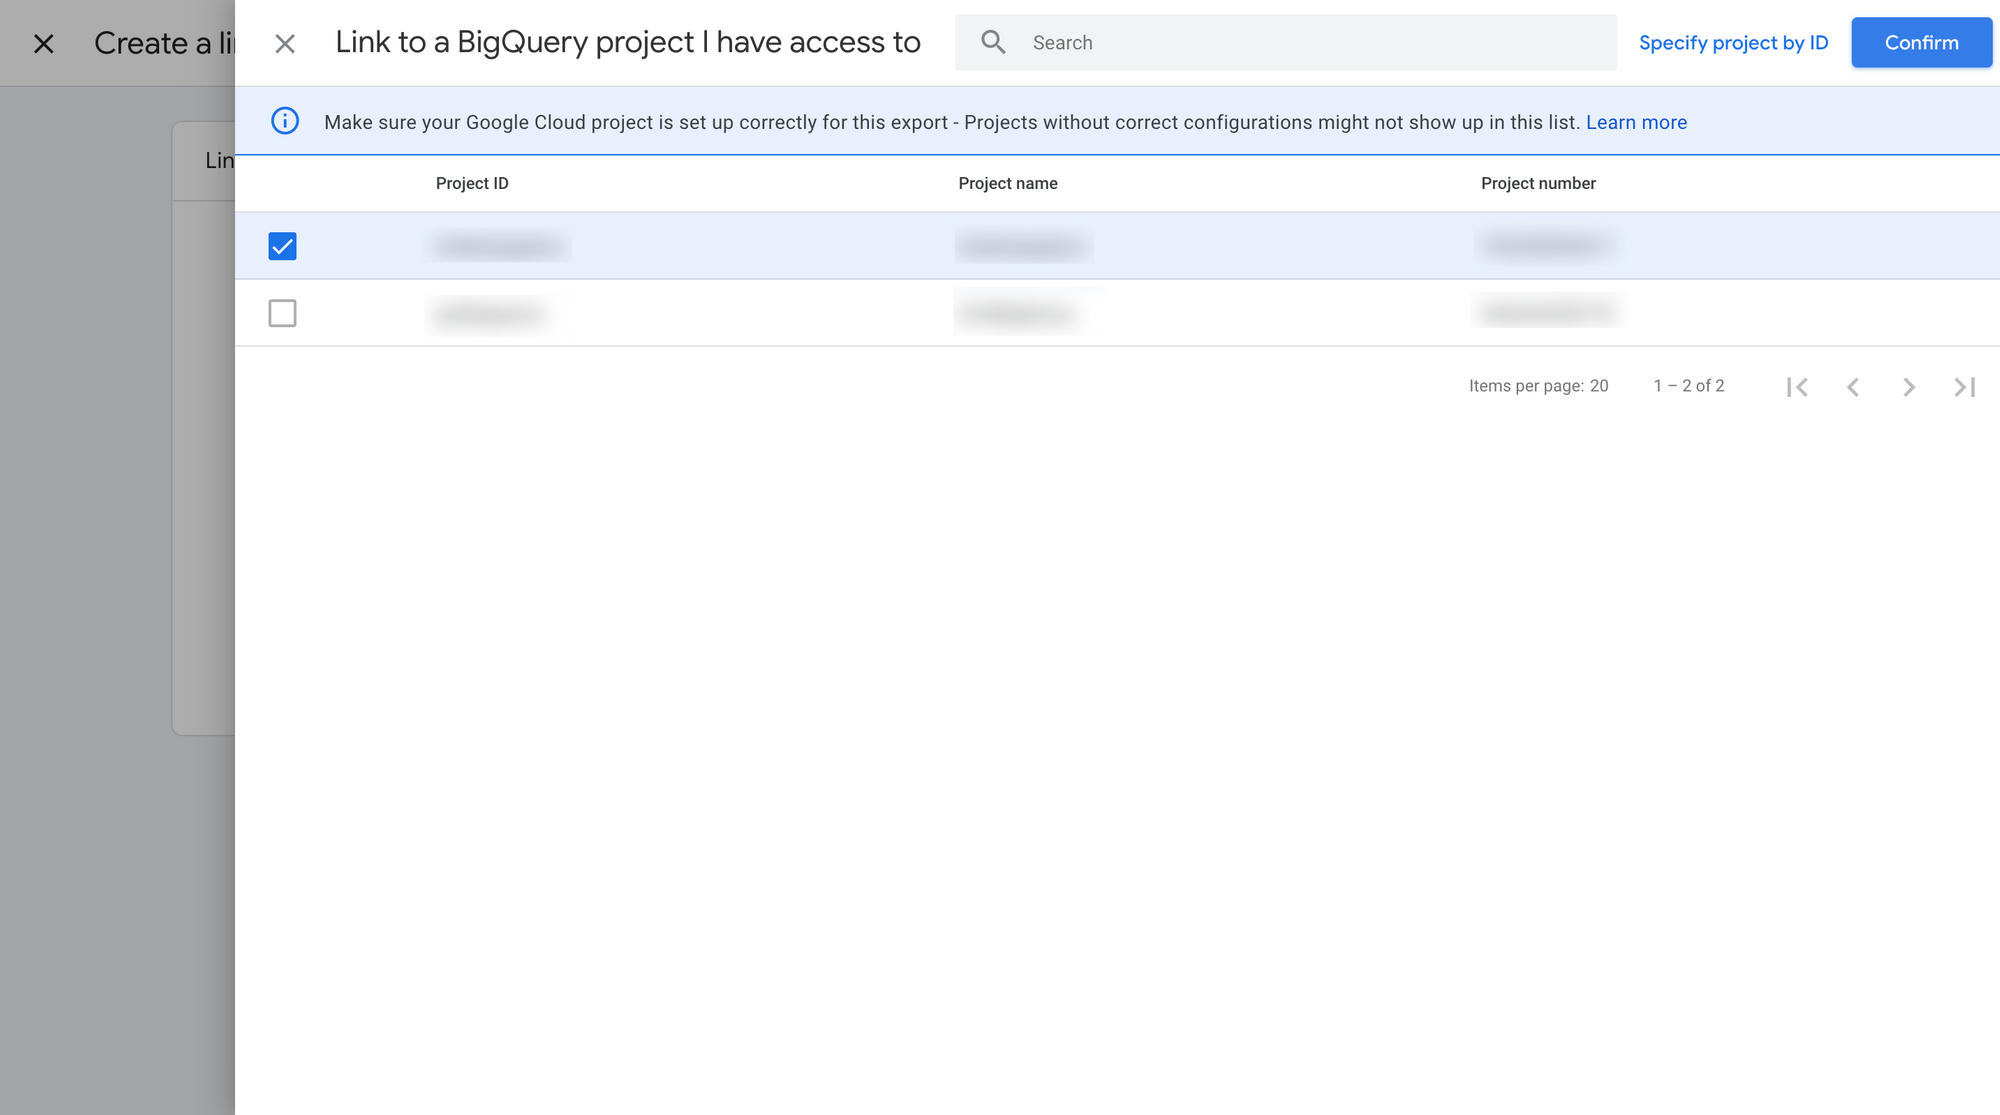
4. Select your existing BigQuery (Google Cloud) project and click Confirm. If your project is not here, make sure you've added it in Google Cloud and refresh this page.
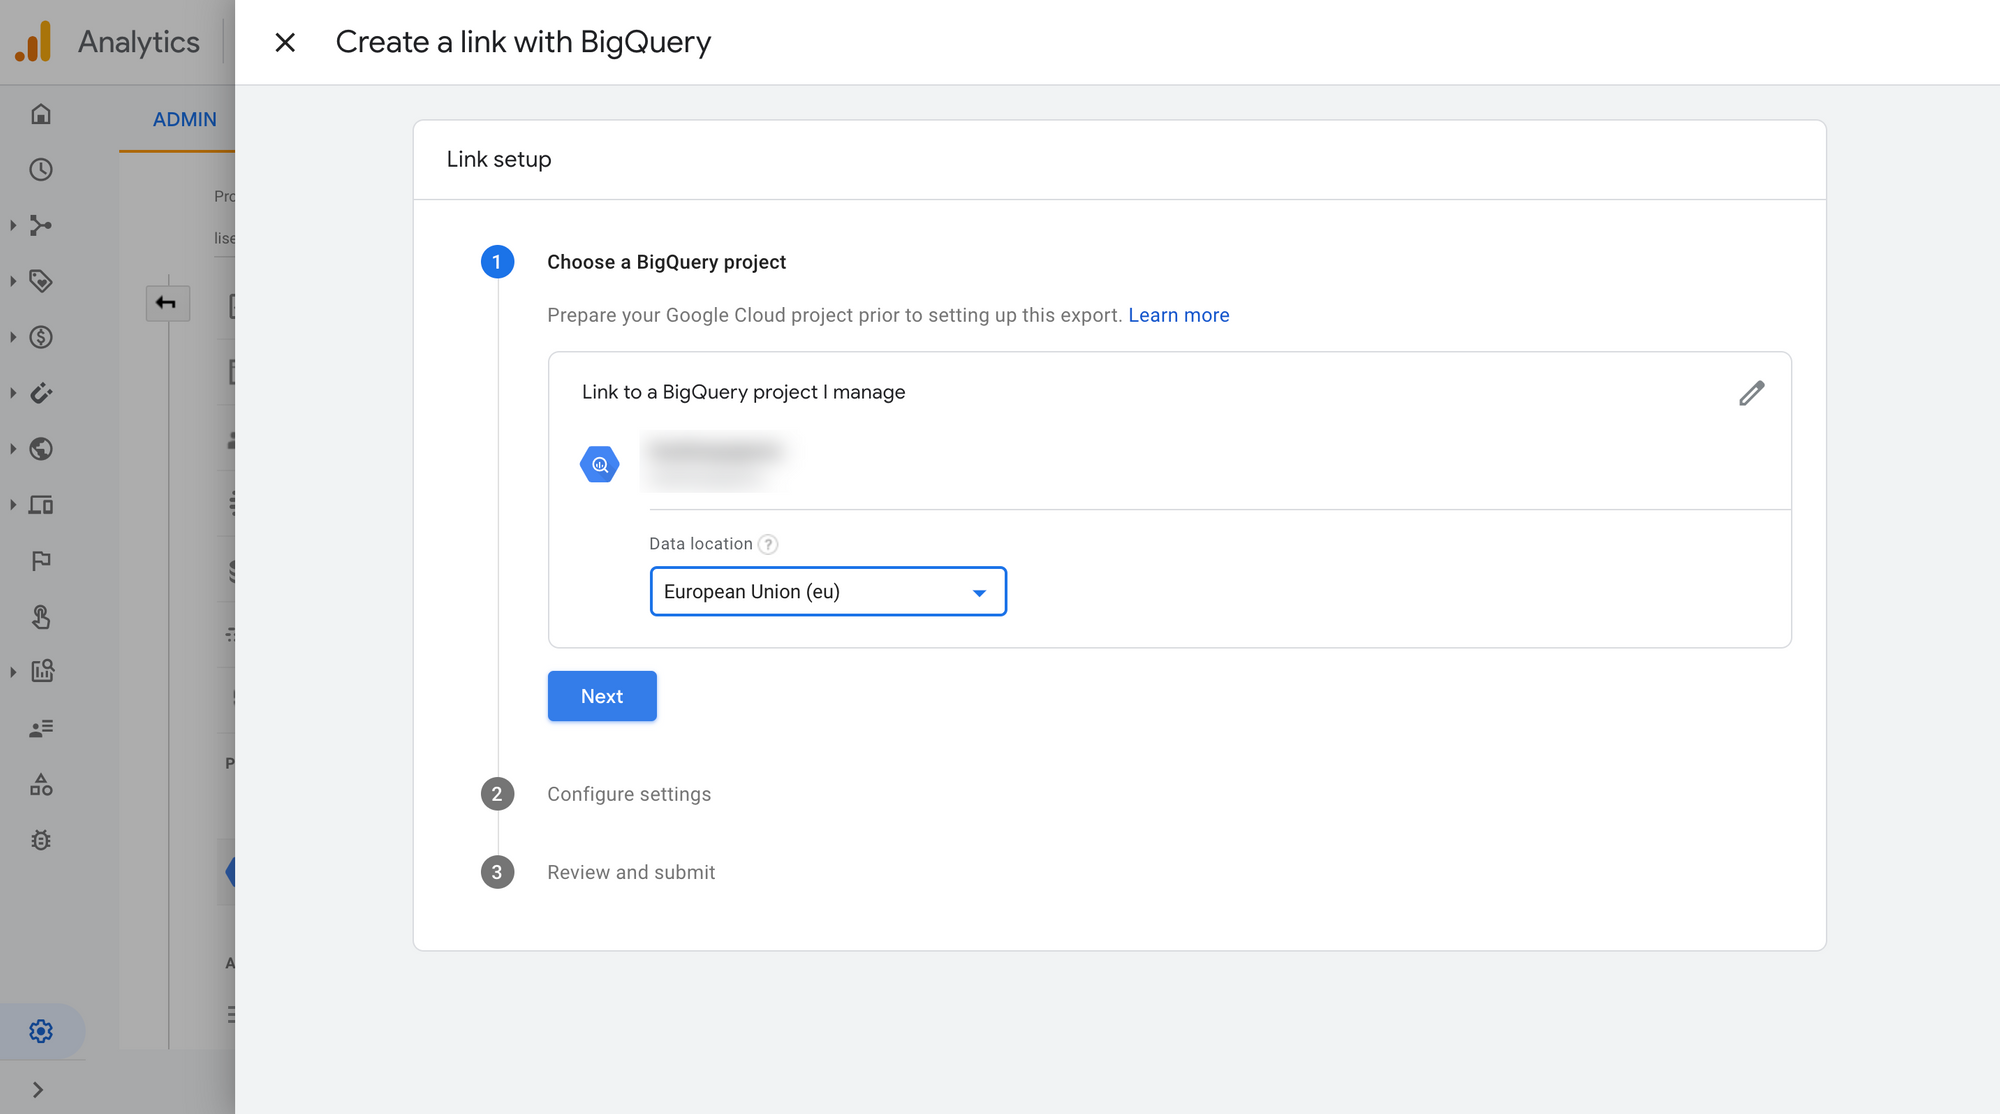
5. Select your preferred data location. Make sure you choose the location where you run your queries. If you choose the wrong region and need to change it after you've created the link, you have to move the data set in Google Cloud and then create a new link, or delete the link and dataset and start over.
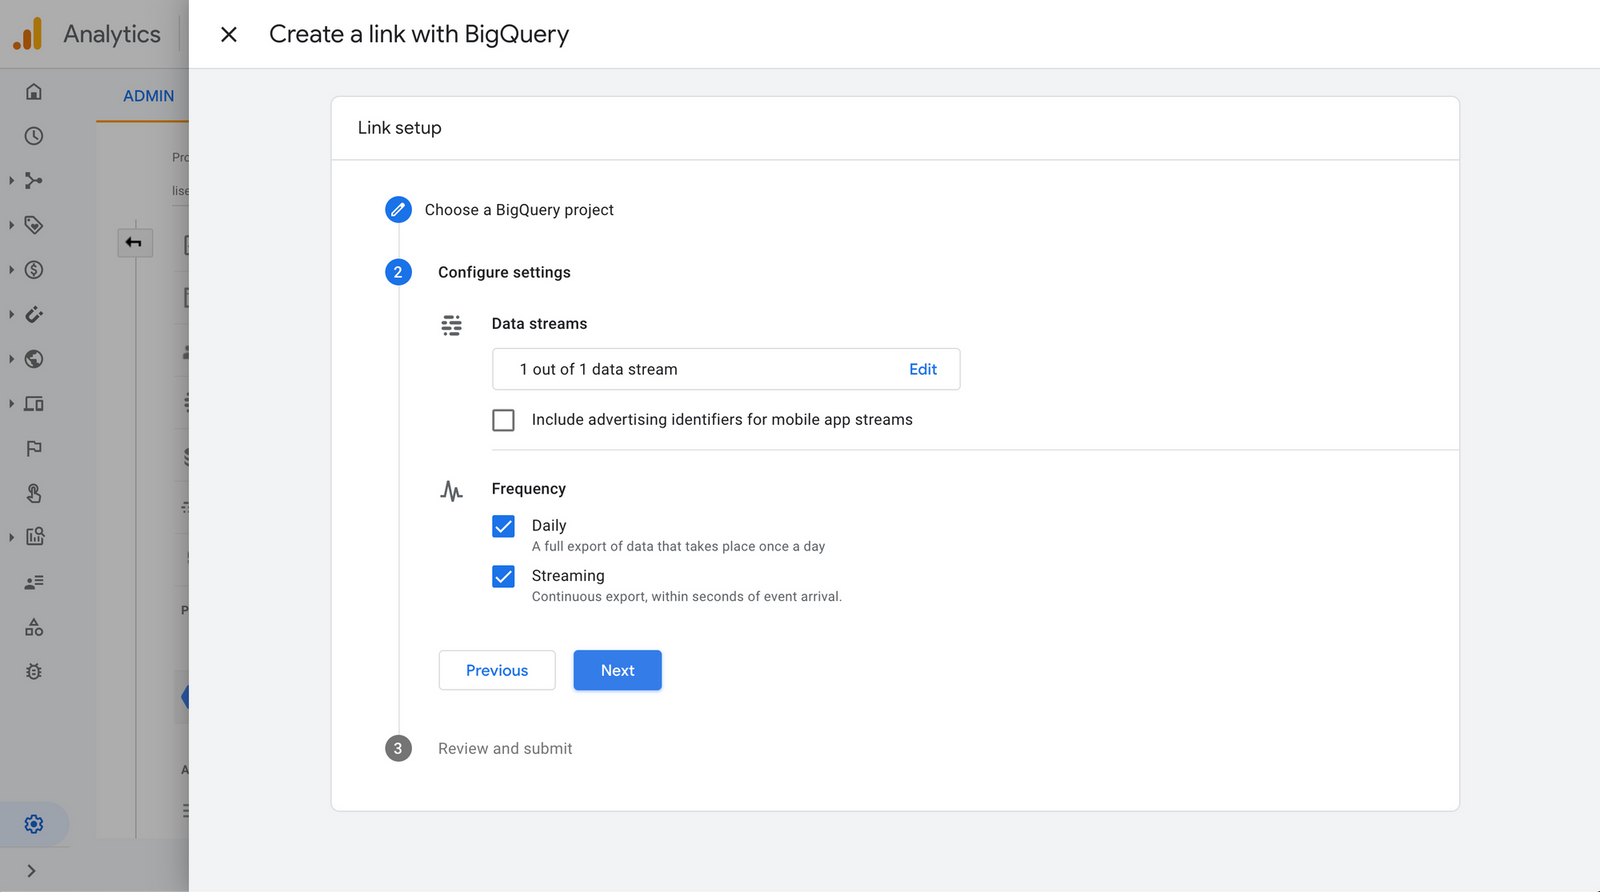
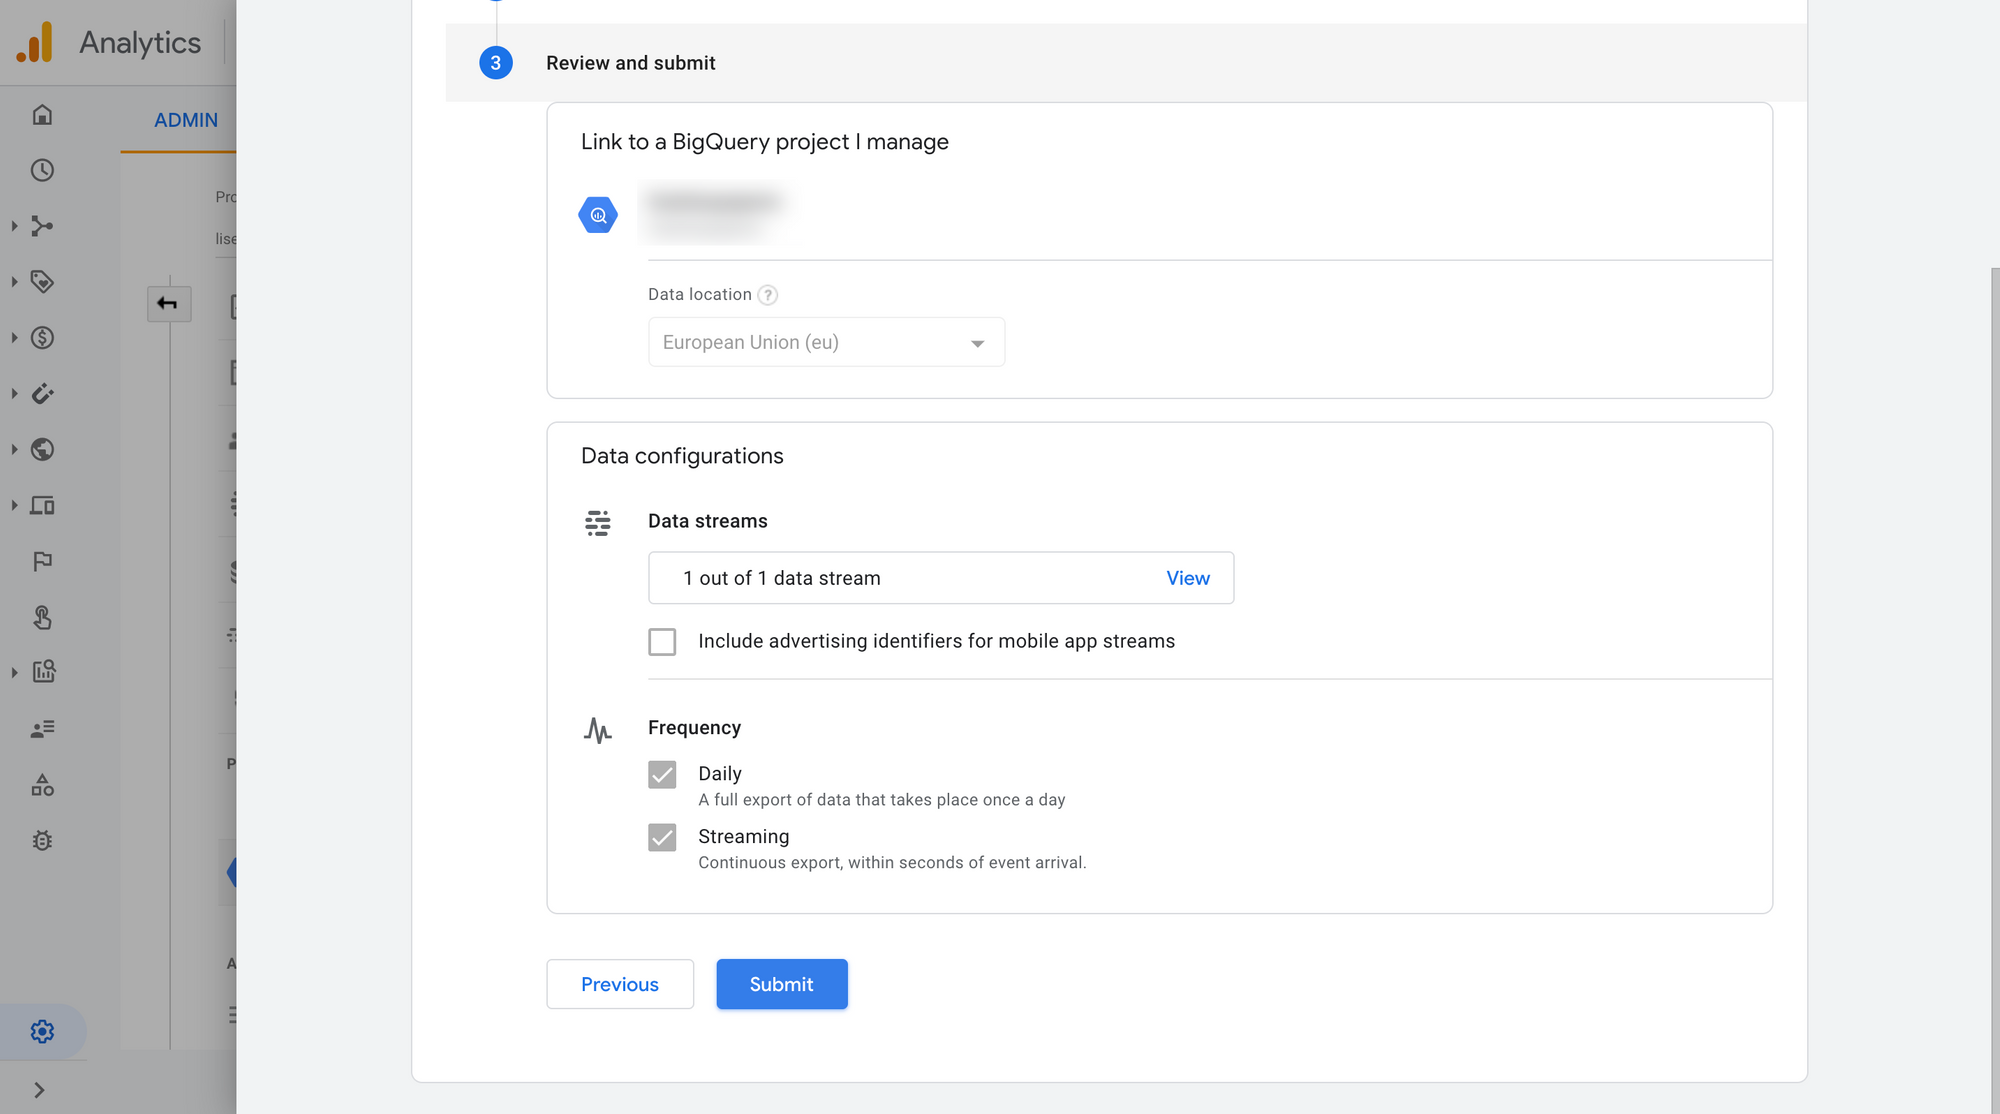
6. Select the desired frequency of the data export. Daily for once a day and optional Streaming to add a table where data from today will be stored until the day is complete and a new daily table will be added. If you have another data stream (app or web) you can add it to the same BigQuery dataset via Edit.
Please be aware that the Streaming option is not available for BigQuery sandbox environments. You can, however, enable the streaming export later, if you upgrade to a billing enabled account.

7. Review the settings and if everything is correct, click Submit.
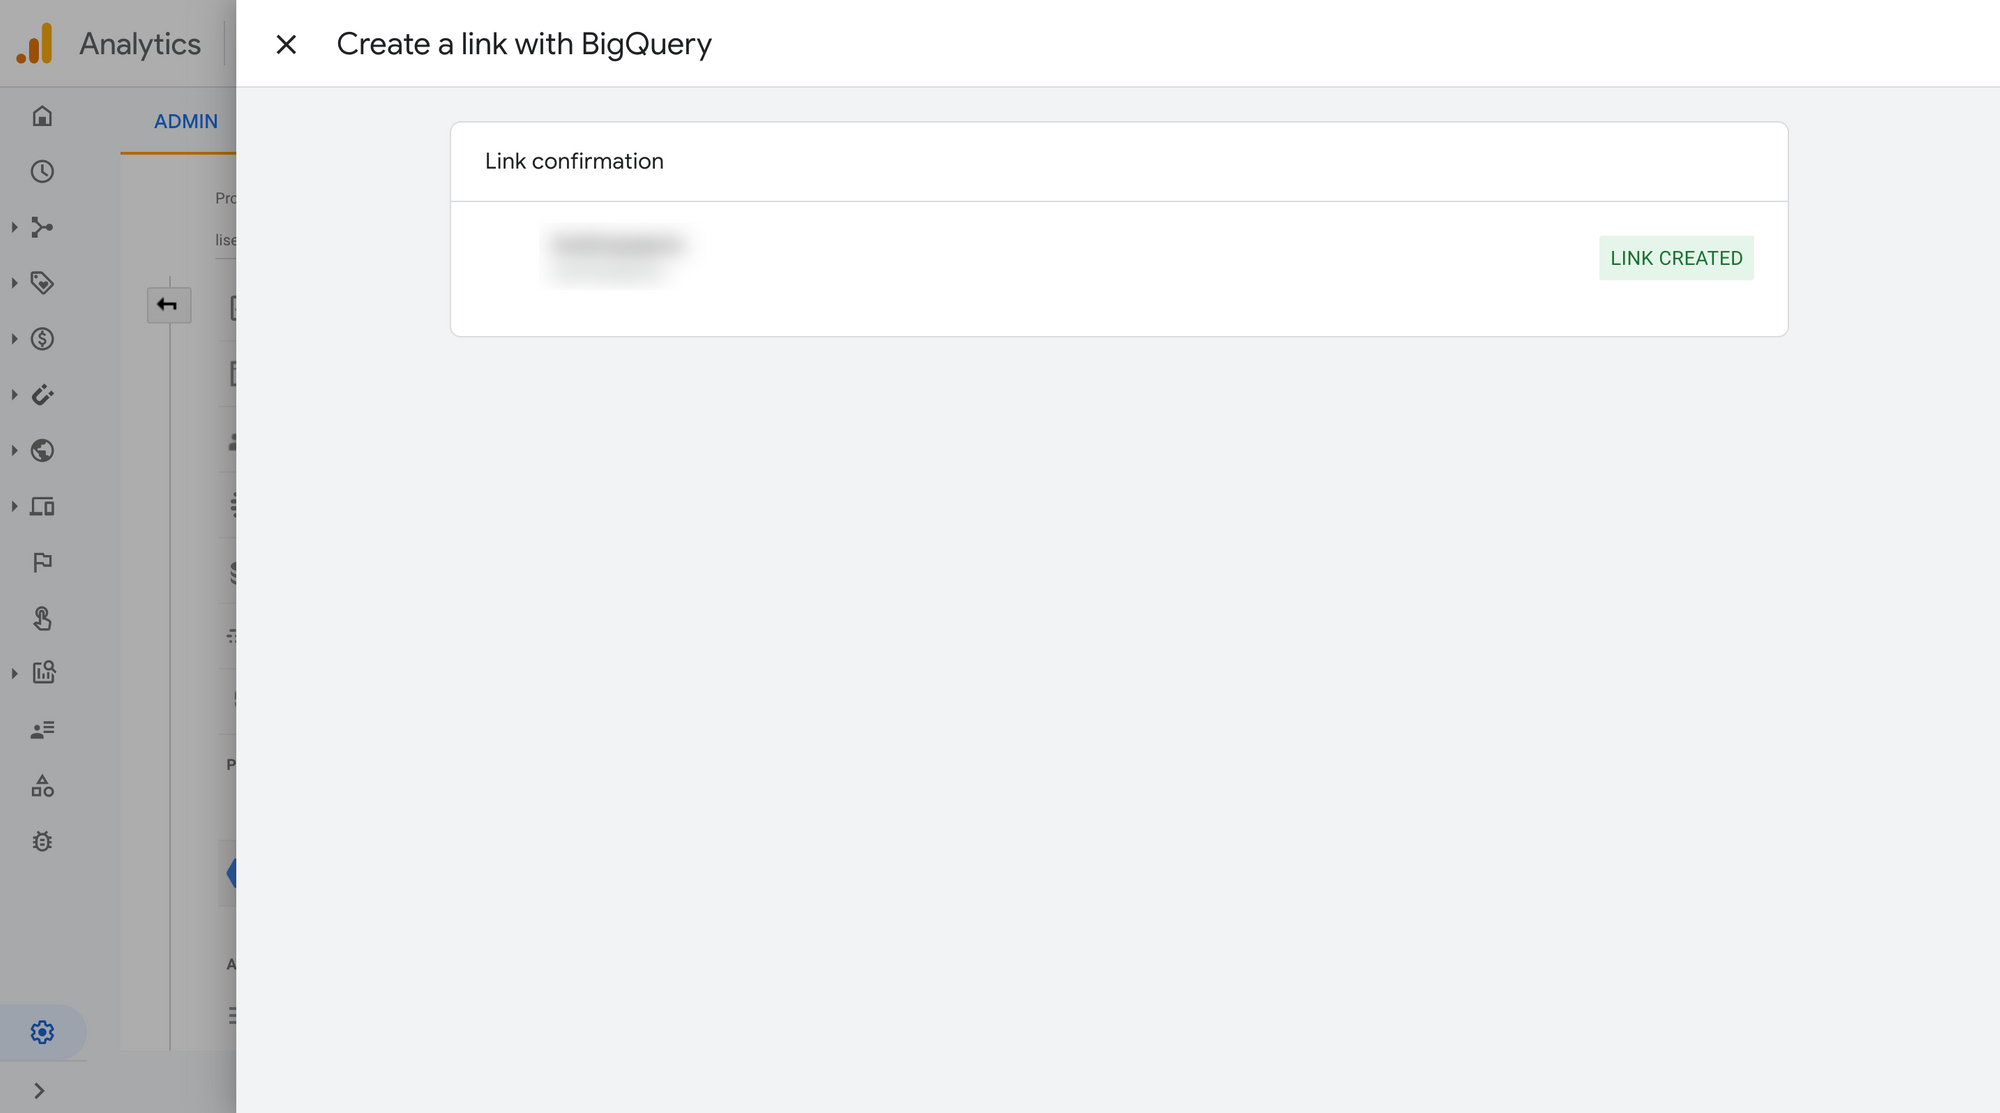
8. The BigQuery link is created. It will take some time (max 24 hours) for your data to appear in BigQuery.
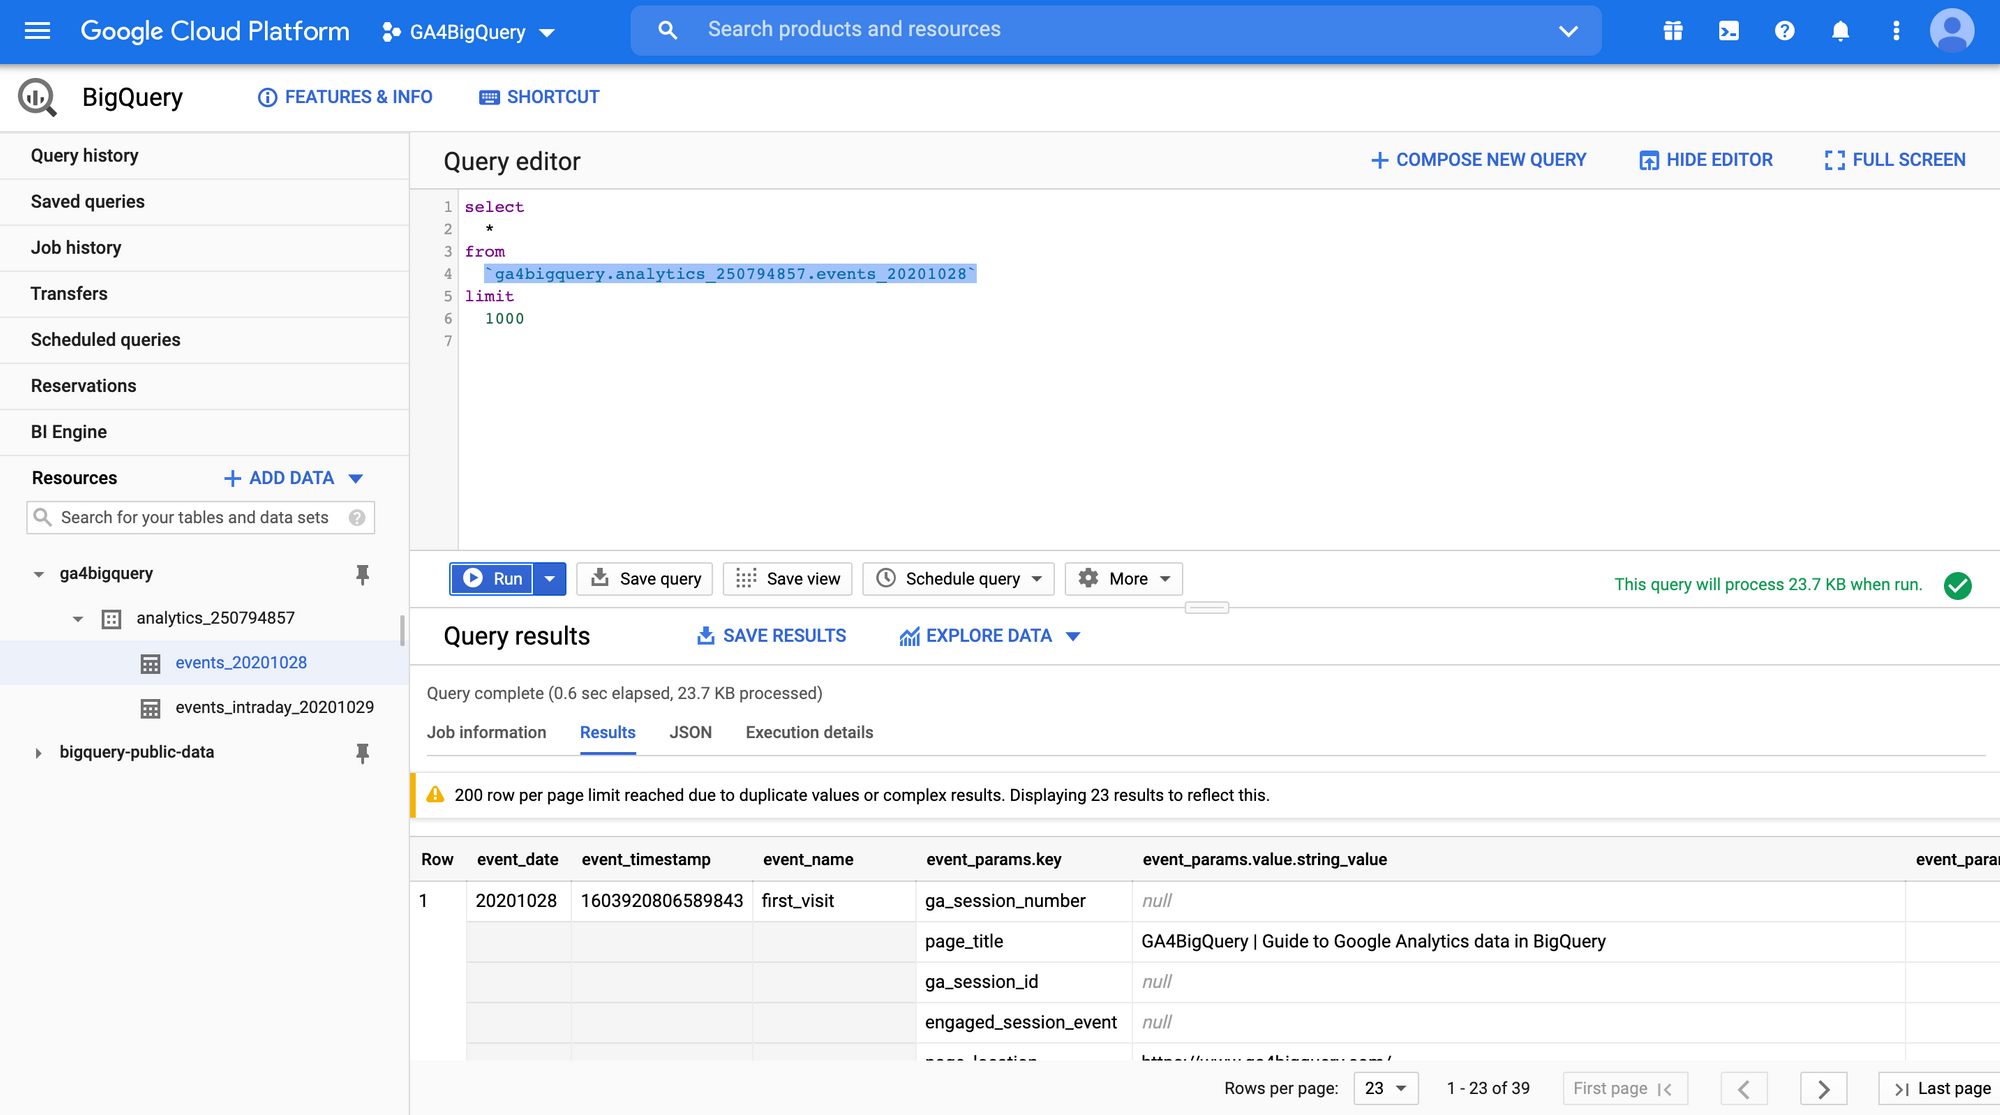
9. When the data starts flowing in you should be able to query the table(s) and see some results!
Now it's your turn!
I hope you've enjoyed this and feel a bit more confident to utilise your own Google Analytics data in BigQuery. Drop a line in the comments if you have any questions, feedback or suggestions related to this article.